
728x90
SliverAppBar를 사용하면 스크롤 시 앱바의 크기가 줄어들거나 색이 변하는 등의 효과를 넣을 수 있다.
Scaffold의 AppBar를 지정하지 않고 body 에 CustomScrollView의 인스턴스를 저장했다.
SliverFillRemaining 위젯은 하나의 정적인 화면을 구성할 때 사용한다.
|
import 'package:flutter/material.dart';
class SliverPage extends StatelessWidget {
const SliverPage({Key? key}) : super(key: key);
@override
Widget build(BuildContext context) {
return CustomScrollView(
slivers: [
SliverAppBar(
pinned: true, // 축소될 때 AppBar가 고정될지 사라질지 설정
expandedHeight: 180.0, // 확대될 때의 최대 높이
flexibleSpace: FlexibleSpaceBar( // 확대/축소되는 영역의 UI
title: Text('Sliver'),
background: Image.asset(
'assets/images/header-01.png',
fit: BoxFit.cover,
),
),
),
SliverFillRemaining( // 내용 영역
child: Center(
child: Image.asset('assets/images/nature-01.png'),
),
),
],
);
}
}
|
SliverGrid 예제
이미지를 추가하는 과정에서 여백이 생겨 보기가 좋지 않았다.
이미지를 대략 일정한 높이와 너비로 미리 맞춰 준비하는 것이 필요했다.
그리고 옵션을 주지 않으면 정사각형 이미지를 추가하므로
childAspectRatio: (1.26 / 1), // (itemWidth / itemHeight) 높이와 너비에 대한 비율로 계산하여 표기하는 것이 중요하다.
|
import 'package:flutter/material.dart';
class SliverPage extends StatelessWidget {
const SliverPage({Key? key}) : super(key: key);
@override
Widget build(BuildContext context) {
return CustomScrollView(
slivers: [
SliverAppBar(
pinned: true, // 축소될 때 AppBar가 고정될지 사라질지 설정
expandedHeight: 180.0, // 확대될 때의 최대 높이
flexibleSpace: FlexibleSpaceBar(
// 확대/축소되는 영역의 UI
title: Text('Sliver'),
background: Image.asset(
'assets/images/header-01.png',
fit: BoxFit.cover,
),
),
),
SliverGrid(
gridDelegate: SliverGridDelegateWithFixedCrossAxisCount(
crossAxisCount: 2,
childAspectRatio: (1.26 / 1), // (itemWidth / itemHeight)
),
delegate: SliverChildBuilderDelegate(
(BuildContext context, int index) {
return Container(
alignment: Alignment.center,
child: Image.asset('assets/images/nature-0${index}.png'),
);
},
childCount: 6,
),
),
//Sliver 2
SliverGrid(
gridDelegate: SliverGridDelegateWithFixedCrossAxisCount(
crossAxisCount: 3,
),
delegate: SliverChildListDelegate(
[
Container(color: Colors.red, height: 150.0),
Container(color: Colors.purple, height: 150.0),
Container(color: Colors.green, height: 150.0),
Container(color: Colors.cyan, height: 150.0),
Container(color: Colors.indigo, height: 150.0),
Container(color: Colors.black, height: 150.0),
],
)),
],
);
}
}
|
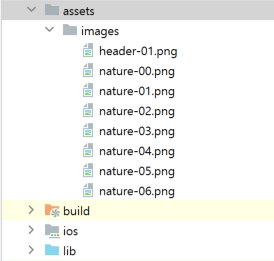
이미지 가져오는 과정
assets 폴더와 서브 폴더로 images 를 추가하고 이곳에 이미지를 추가했다.
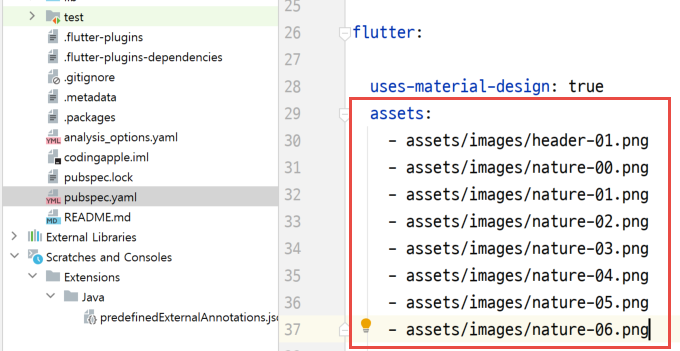
pubspec.yaml 파일 내에 아래와 같이 이미지를 등록해줘야 한다.
|
SliverToBoxAdapter(
child: Container(
height: 100.0,
child: ListView.builder(
scrollDirection: Axis.horizontal,
itemCount: 10,
itemBuilder: (context, index) {
return Container(
width: 100.0,
child: Card(
child: Text('data-${index + 1}'),
),
);
}),
),
),
SliverPadding(
padding: EdgeInsets.all(2.0),
sliver: SliverList(
delegate: SliverChildListDelegate(
[
Card(
child: Text('data'),
),
Card(
child: Text('data'),
),
Card(
child: Text('data'),
),
Card(
child: Text('data'),
),
],
),
),
),
|
'Flutter 앱 > Layout' 카테고리의 다른 글
| Flutter Column 위젯 (0) | 2022.06.24 |
|---|---|
| Flutter Container 위젯 (0) | 2022.06.24 |
| Flutter Drawer Widget (0) | 2022.06.16 |
| Flutter Layout (0) | 2021.12.26 |
| Flutter Theme(테마) 변경 (0) | 2021.12.24 |

Link2Me